


Highlights
- Fill sandbags approximately half full. If bag is too full, it becomes too rigid to fill in the gaps of the sand bag wall.
- Use Super Sacks (bulk fibc totes) as a quick bulk option for a sand bag wall.
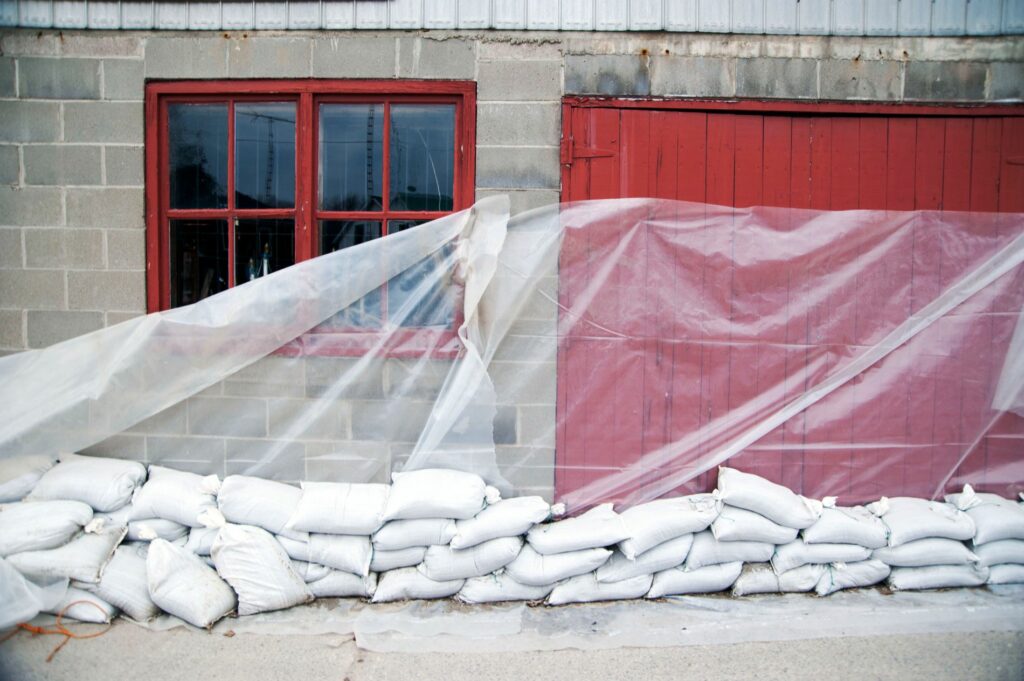
- If needed, use plastic wrap within each layer of the sand bag wall to protect any water leaking through.
- To calculate how many sandbags needed, use the following:
- 1′ H x 10′ W = 50 Sandbags
- 2′ H x 10′ W = 100 Sandbags
- 3′ H x 10′ W = 150 Sandbags
- Or use our handy Sandbag Wall Calculator:
- Calculate the total sand needed by multiplying the number of bags by 35 lbs
- 1 Cubic Yard of Sand weighs 2,700 lbs = ~80 bags filled ~35 lbs
1. Introduction
- Purpose of a Sandbag Wall:
A sandbag wall serves various purposes, primarily providing a quick and effective solution for flood control, erosion prevention, flood barrier, and temporary fortifications. The purpose of constructing a sandbag wall can range from protecting property against rising water levels to creating barriers in emergency situations. - Advantages of Sandbag Construction:
Sandbag construction offers several advantages, including cost-effectiveness, simplicity, and adaptability to different terrains. Sandbags can be quickly deployed and filled on-site, making them a versatile solution for a wide range of scenarios, from flood response to military applications. - Safety Considerations:
Safety is paramount in any construction project. Before initiating the construction of a sandbag wall, it is crucial to consult with local authorities and experts to ensure compliance with safety regulations. Understanding potential risks, such as unstable ground or adverse weather conditions, is vital to prevent accidents and ensure the well-being of workers and the community.
2. Materials and Tools
- Sandbags:
- Select durable and properly filled sandbags to form the core of the wall. High-quality sandbags will provide stability and longevity to the structure. Our economy sandbags come with 1600 hrs of UV protection, making them a low cost, high-quality sandbag.
- To calculate how many sandbags needed, use the following:
- 1′ H x 10′ W = 50 Sandbags
- 2′ H x 10′ W = 100 Sandbags
- 3′ H x 10′ W = 150 Sandbags
- etc.
- If Sand is not on site, calculate the total sand needed by multiplying the number of bags by 35 lbs
- 1 Cubic Yard = 80 bags filled ~35 lbs
- Sand:
- Choose clean and well-graded sand to fill the sandbags. The quality of the sand directly influences the effectiveness of the wall.
- Shovel:
- A sturdy shovel is essential for filling sandbags efficiently. Choose a shovel with a comfortable grip to minimize strain during the construction process.
- Tamping Tool:
- A tamping tool, such as a hand tamper or a mechanical compactor, is necessary to compact the sandbags and enhance the stability of the wall.
- Plastic Sheeting:
- Plastic sheeting may be required to add an additional layer of protection against water penetration. Select a durable and waterproof material for optimal results.
- Stakes:
- Stakes provide support and anchor the sandbag wall to the ground. Use stakes made of durable materials to withstand external forces.
- Rebar Ties:
- Ties are essential for securing sandbags together and maintaining the integrity of the wall. Choose strong and weather-resistant ties to withstand environmental conditions. We offer either 4″ or 5″ long rebar ties.
3. Site Preparation
- Site Selection:
Choose a suitable location for the sandbag wall, considering factors such as proximity to water sources, terrain, and the extent of protection required. Avoid areas prone to subsidence or other geological risks. - Clearing and Leveling:
Clear the site of debris and vegetation, ensuring a level surface for the construction of the sandbag wall. A clean and level foundation contributes to the stability of the structure. - Foundation Preparation:
Prepare a solid foundation by compacting the soil or adding a layer of gravel. A stable foundation is crucial for the long-term effectiveness of the sandbag wall.
4. Construction Steps
- Filling Sandbags:
Properly fill sandbags with clean sand, approximately half full. Ensure consistent filling to maintain uniformity in the wall structure. If bag is too full, it becomes too rigid to fill in the gaps of the sand bag wall. - Placing the First Layer:
Begin the construction by placing the first layer of sandbags along the designated perimeter. Align the bags carefully, ensuring a solid and even base. - Staggering the Layers:
Stagger subsequent layers to enhance stability. This pattern helps distribute the weight evenly and prevents the wall from collapsing. - Tamping and Compacting:
Regularly tamp and compact each layer with a suitable tool to eliminate air gaps and enhance the overall stability of the sandbag wall. - Adding Layers:
Continue adding layers until the desired height is achieved. Regularly check for uniformity and stability during the construction process. - Creating Slopes and Angles:
Adjust the slope and angle of the sandbag wall to meet specific requirements, such as reinforcing against water flow or providing additional structural support. - Building Corners and Junctions:
Pay special attention to corners and junctions, ensuring they are well-reinforced and tightly sealed. Proper construction at these points is critical for the overall integrity of the sandbag wall. - Adding Plastic Sheeting (if needed):
If additional water resistance is required, carefully attach plastic sheeting to the wall, ensuring a secure and waterproof barrier. - Securing the Wall with Stakes:
Secure the sandbag wall to the ground using stakes. Drive the stakes deep into the soil to anchor the structure and prevent movement. - Tying Sandbags Together:
Use strong ties to secure individual sandbags together, creating a cohesive and robust structure. Proper tying helps maintain the shape of the wall and prevents displacement.
5. Maintenance and Inspection
- Regular Inspection:
Regularly inspect the sandbag wall for signs of wear, erosion, or damage. Early detection allows for prompt maintenance and ensures the ongoing effectiveness of the structure. - Repairing Damaged Sections:
Address any damaged sections immediately by replacing compromised sandbags or reinforcing weak points. Timely repairs prevent further deterioration of the wall. - Adding Layers as Needed:
Depending on changing conditions or requirements, consider adding additional layers to enhance the height and strength of the sandbag wall.
6. Safety Tips
- Proper Lifting Techniques:
Train workers on proper lifting techniques to prevent injuries. Lift with the legs, not the back, and use team lifting for heavy loads. - Watch for Signs of Instability:
Regularly assess the stability of the sandbag wall. Look for signs of leaning, shifting, or erosion, and take corrective action as needed. - Work in Pairs or Teams:
Encourage teamwork to promote efficiency and safety. Working in pairs allows for mutual assistance and increases awareness of potential hazards. - Emergency Procedures:
Establish clear emergency procedures and evacuation routes. Ensure all workers are familiar with these procedures to respond promptly to unforeseen circumstances.
7. Environmental Considerations
- Proper Disposal of Sandbags:
Follow local guidelines for the proper disposal of sandbags after use. Consider environmentally friendly disposal methods to minimize impact. - Minimizing Impact on Surrounding Ecosystems:
Take precautions to minimize the environmental impact of the construction process. Avoid disturbing local ecosystems and adhere to regulations governing construction near water bodies.
8. How to Prepare Before A Flood
Flood Prevention Checklist:
- Inspect and Maintain Gutters:
- Clear debris, leaves, and sticks from gutters and downspouts.
- Ensure proper drainage away from the foundation.
- Sump Pump Check:
- Test and inspect your sump pump to ensure it is working properly.
- Consider installing a battery backup for the sump pump.
- Basement Sealing:
- Apply weatherproof sealant around basement windows and doors.
- Check for and repair any cracks in the foundation.
- Landscaping Drainage:
- Grade your yard away from the foundation to encourage water runoff.
- Ensure downspouts extend at least 3 feet away from the house.
- Inspect Foundation Vents:
- Open foundation vents to allow air circulation and prevent moisture buildup.
- Check for any blockages or debris.
- Check Sewer Back-Up Systems:
- Inspect and maintain sewer back-up valves.
- Plug basement drains when necessary.
- Secure Valuables and Electricals:
- Elevate electrical appliances and valuable items in basements.
- Ensure important documents are stored in waterproof containers.
- Check Insurance Coverage:
- Review your home insurance policy for flood coverage.
- Consider purchasing flood insurance if not already covered.
- Inspect and Clear Storm Drains:
- Clear debris from street storm drains near your property.
- Ensure proper drainage in the surrounding area.
- Inspect Outdoor Grading:
- Check the slope of the ground around your home.
- Address any low areas that may pool water.
- Flood Barriers and Sandbags:
- Have flood barriers or sandbags on hand, especially if you live in a flood-prone area.
- Familiarize yourself with proper sandbag placement techniques.
- Home Inspection:
- Schedule a professional inspection of your home for potential vulnerabilities.
- Address any issues identified during the inspection promptly.
- Emergency Kit Preparation:
- Assemble a 72-hour emergency kit with essential supplies.
- Include important documents, medications, and contact information.
- Community Alerts:
- Stay informed about local weather forecasts and flood alerts.
- Be aware of community evacuation plans and emergency resources.
- Neighbor Communication:
- Coordinate with neighbors regarding flood preparations.
- Share information about flood prevention measures and resources.
8. Conclusion
- Recap of Key Steps:
Summarize the key steps in constructing a sandbag wall, emphasizing the importance of proper planning, construction techniques, and ongoing maintenance. - Final Thoughts:
Reiterate the significance of prioritizing safety, adapting the guide to specific needs, and seeking professional advice when in doubt. Emphasize compliance with local regulations and permits for construction projects to ensure a successful and responsible sandbag wall construction.