


Highlights
- Sandbags create a physical barrier that diverts the flow of water away from buildings or other areas on your property to prevent flooding.
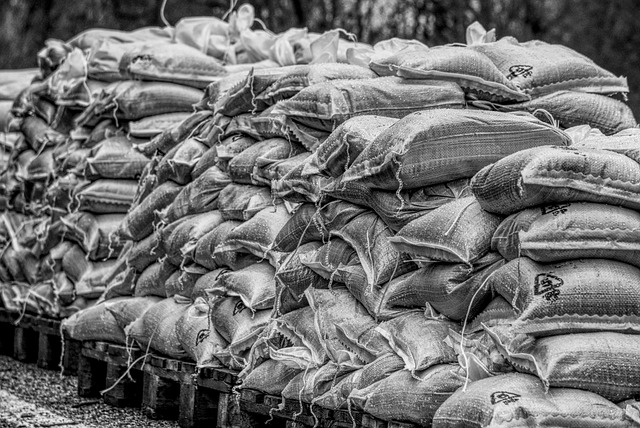
- Bags should be filled to about 2/3 full then stacked in a staggered position (one half overlapping the bag below). The base of the wall may need to be 2-3X the height of the wall. A 4-foot high sandbag levee may need a base width of as much as 8-12 feet.
- Most people who buy sandbags in bulk will purchase them empty then fill sandbags on-site by hand, though you can get filled sandbags delivered.
- Read on to learn how to use sandbags for flooding, including proper filling and stacking procedures.
Sansbags 101: How Do Sandbags Prevent Flood Damage?
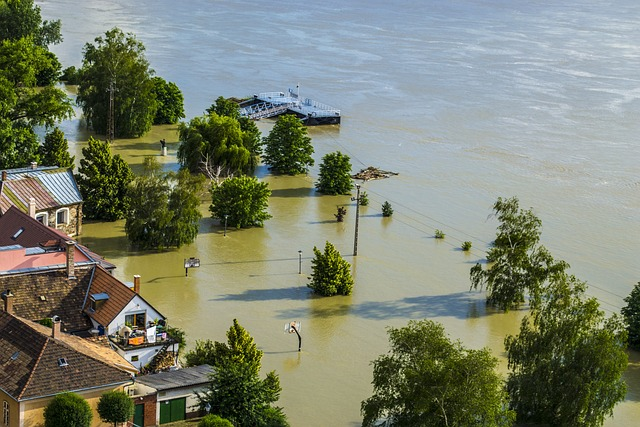
Floods occur year-round, and they’re now the #1 source of property damage in the U.S. and Canada. Coastal or in-land, the story’s the same: lots of rain can cause major damage.
One of the best ways to tackle flood prevention on your own is with the help of cheap, abundant sandbags. They’re an effective and easy way to prevent flood water from damaging buildings, causing erosion, or otherwise impacting your property.
For most people, that means filling and stacking sandbags 2 to 6 rows high to make a sandbag levee.
Sandbags aren’t actually waterproof; they simply create a physical barrier that diverts water away from structures or other important areas quite well.
To use sandbags to prevent flood damage, stack them in a wall or pyramid-shaped arrangement. While they don’t create a perfectly watertight seal, they slow water flow and re-direct it away from vulnerable structures incredibly well – and cheaply too. Sandbags filled with local, on-site materials are one of the cheapest forms of flood protection you’ll find.
Because sandbags can leak, you may want to have a sump pump on the dry side of your wall to remove water that seeps in. Alternatively, you may partially bury buckets to collect seepage, dig a small trench, or dig holes on the dry side of the trench and empty them with buckets.
How To Fill Sandbags
You can purchase pre-filled sandbags or fill your own. But what should you put in sand bags?
Clean sand is the best material for filling sandbags, but sandy soil is a good alternative.
You may also be able to use rocky soil, gravel, or yard dirt if necessary, but take care that rocks or other debris don’t puncture the bags.
Sandbags should be filled to about 2/3 full, leaving enough open space to allow the sand to move about inside the bag. This is central to effective stacking and the physics of creating a quality water barrier.
A rounded shovel is easier to use than a square-end shovel, and a slightly smaller spade works better than large.
To fill sandbags more easily, two people is helpful.
One person should hold the bag open while the other shovels sand in. You will want to fill bags from one-half to two-thirds of their capacity. Properly filled, this prevents them from getting too heavy and allows you to stack them with a tight seal. The slightly droopy bags will “mold” to their surroundings and each other, creating more effective sandbag walls.
If you plan to transport the bags, tie them off. Otherwise, fold over the top of the bag while leaving room for the sand to move. Don’t cram your sandbags full! There’s nothing more annoying than a too-heavy sandbag or tied sandbags that you can’t even grab.
For large-scale operations, you may fill sandbags with specialized devices such as bag-holding racks, metal funnels, and even power loading equipment.
The Right Way To Stack Sandbags
Once you’ve filled the bags —or bought filled sandbags— place them in position. If you’re protecting closed doors or windows, stack the bags directly in front of and against the area. You may also want to protect larger areas, such as the perimeter of your yard or the foundation of your home.
Always place sandbags outside of the building. Even if you place them directly inside, water can still get in.
Follow these steps to stack sandbags as a flood barrier:
- No matter where you build the wall of sandbags, an essential first step is to clear the ground. Remove debris, which can puncture sandbags, and even ice and snow, which can cause the barrier to fail due a mediocre seal between the ground and the sandbag.
- Start by placing the bags end-to-end (lengthwise) so the bottom edge forms a seal along the ground. Again, a bag that is less than 2/3 full will be much easier to place. Pat down the bags before stacking the next row to create a tighter seal. Even on uneven ground, loosely filled sandbags are quite easy to maneuver.
- For the following rows, offset each bag by half a bag’s length over the previous bag and row, as you would laying bricks. Place all of the bags on this second row before placing subsequent rows.
- Some users fortify the sandbag wall with a layer of waterproof plastic sheeting from the top of the pyramid down to the base for added protection against flood waters.
For walls of more than three rows, you will likely need to place bags in a pyramid shape to prevent them from falling over. These barriers may need a base width that is two to three times the height. For example, a sandbag levee or wall that is 5 feet tall may need a base width of over 10 feet.
When pre filing and preparing large numbers of sandbags, this really is a two person operation. A multi-person sandbag filling approach is sometimes called a relay line, in which one or two people fill the empty bag, one person ties the bags, then bags are handed down the line
The Best Sandbags in Canada
Looking for dependable sandbags in Canada? Based in Manitoba, St. Boniface Bag Co. has been a leading supplier of sandbags for over a decade. With multiple sizes and material options, we’ve got the right sandbag for you.
FAQs
What kinds of sand bags are there?
Sandbags come in a variety of materials, including burlap, polypropylene, polyethylene, and nylon. All of these types of sandbags work for flood prevention, but they each have pros and cons. Woven polypropylene sandbags can last two to ten years depending on sun exposure, but they are not biodegradable.
Burlap, on the other hand, is biodegradable but may only last for a year or two depending on exposure to severe weather. Because these are biodegradable sandbags, they’re commonly used in situations where you simply want them to disappear with time: erosion control, holding objects in place temporarily (like pipelines), for flood control, and more.
How heavy are sandbags??
The weight of sandbags depends on the size of the sandbag, the type of sand or soil inside, and how full you fill it.
A typical 14-inch by 26-inch sandbag (which is the standard sandbag size, and deployed by the Army Corps) can hold 40 to 50 pounds.
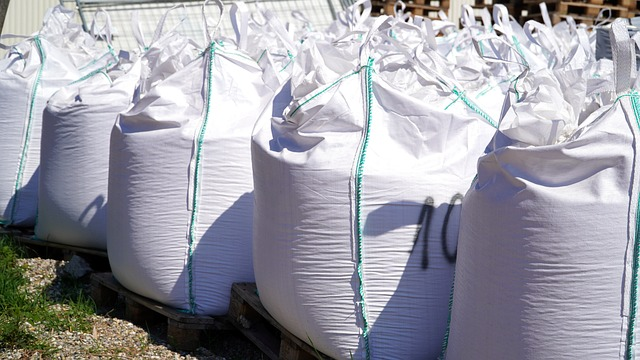
An overfilled bag may weigh 60 to 75 pounds. A bulk FIBC bag can weigh up to 2,200 pounds, which requires a forklift, crane, or hoist to move.
Can I reuse the sand from sandbags?
You should use caution when reusing sand or soil from sandbags, as it may be soaked with contaminated floodwater. Contact your local municipality or landfill for proper disposal instructions.
In an emergency, what can I used instead of a sandbag?
Garbage bags can work in a pinch to reduce flood water damage at doorways and other smaller situations. Consider a double bag in case of punctures.